

How to change system language on Windows 11
Windows xi makes it like shooting fish in a barrel to change the system linguistic communication settings if you lot made a mistake during the initial setup or the computer came with the wrong language.
Regardless of the reason, if you must alter the language settings, you can download, install, and apply a new configuration through the "Time & language" settings without reinstalling Windows 11.
In this Windows eleven guide, we will walk you through the steps to change the computer's default language.
How to change default language on Windows xi
If the device came with the incorrect language, you tin can change the settings without reinstalling anything. You but need to follow these instructions.
Disable sync for language settings
Since the language preferences volition sync across devices, which means that if y'all only desire to update the settings on a particular computer, you will need to disable the language settings synchronization option. Of form, you tin skip these instructions if you want the new settings to sync across devices.
To stop syncing the language preferences on Windows 11, use these steps:
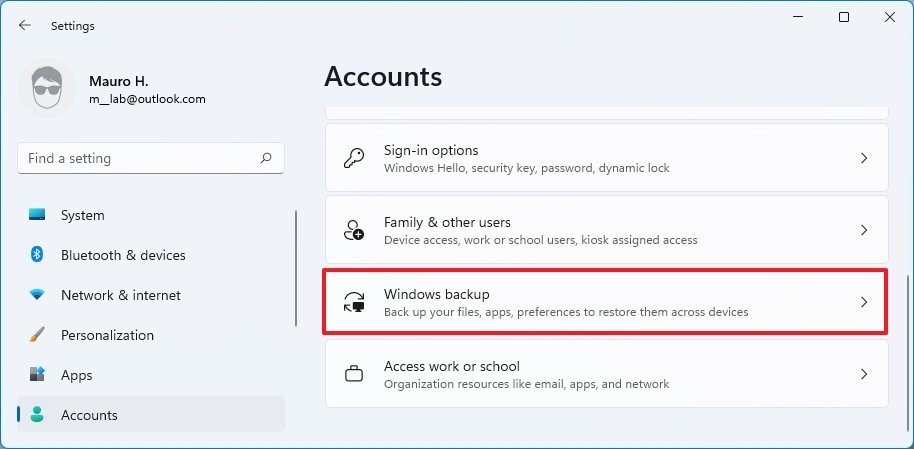
- Open up Settings.
- Click on Accounts.
-
Click the Windows backup folio in the right side.
 Source: Windows Central
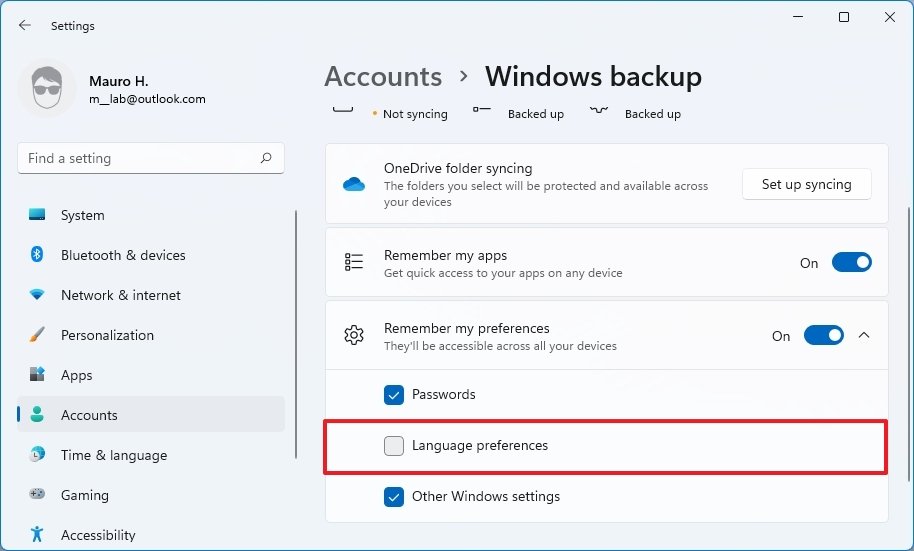
 - Click the Remember my preferences setting.
-
Clear the Language preferences option.
 Source: Windows Cardinal


In one case y'all complete the steps, you tin proceed to change the language settings without affecting all the other computers connected with the same Microsoft account.
Change language settings
To change the Windows xi default linguistic communication, use these steps:
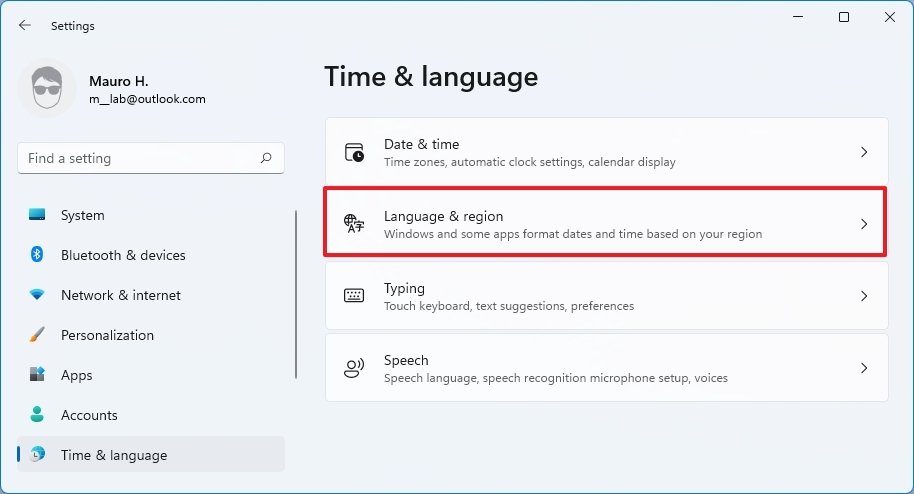
- Open Settings.
- Click on Time & language.
-
Click the Language & region folio in the right side.
 Source: Windows Central
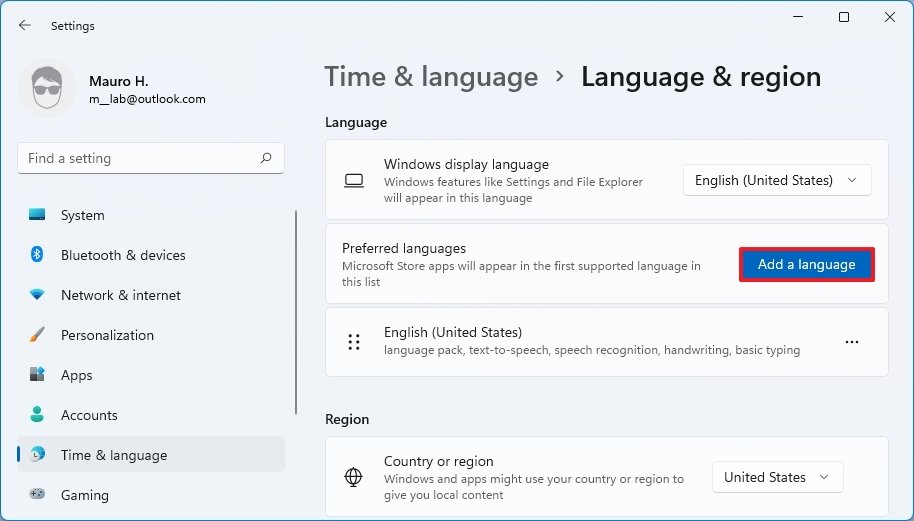
 -
Nether the "Linguistic communication" department, click the Add together a language button for the "Preferred languages" setting.
 Source: Windows Cardinal
 -
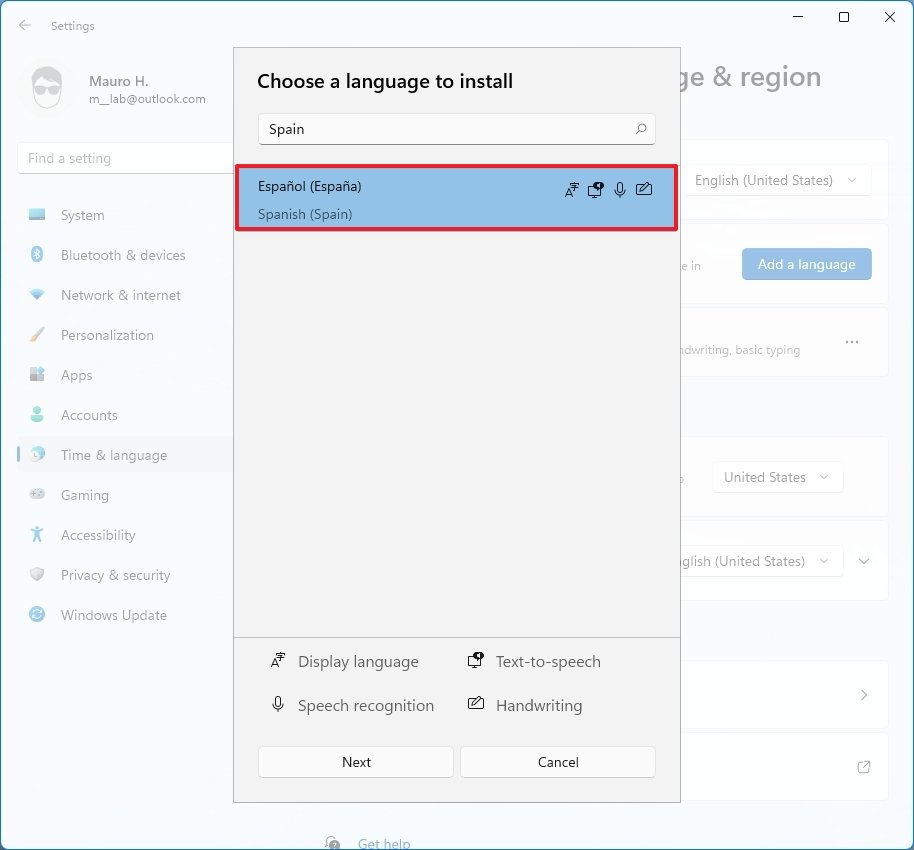
Search for the new linguistic communication.
Quick tip: You lot can search the country'south name to observe the language faster.
-
Select the linguistic communication.
 Source: Windows Key
 - Click the Next button.
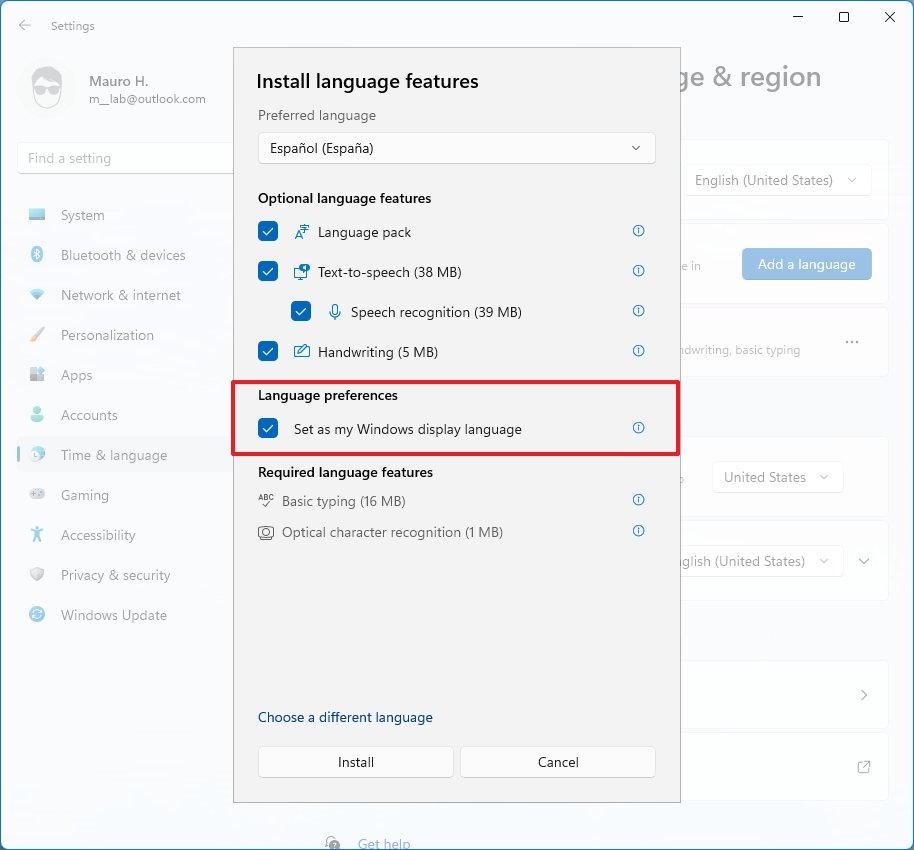
- (Optional) Cheque the optional language features to install on Windows 11.
-
Cheque the Set up as my Windows display language pick.
 Source: Windows Key
 - Click the Install push.
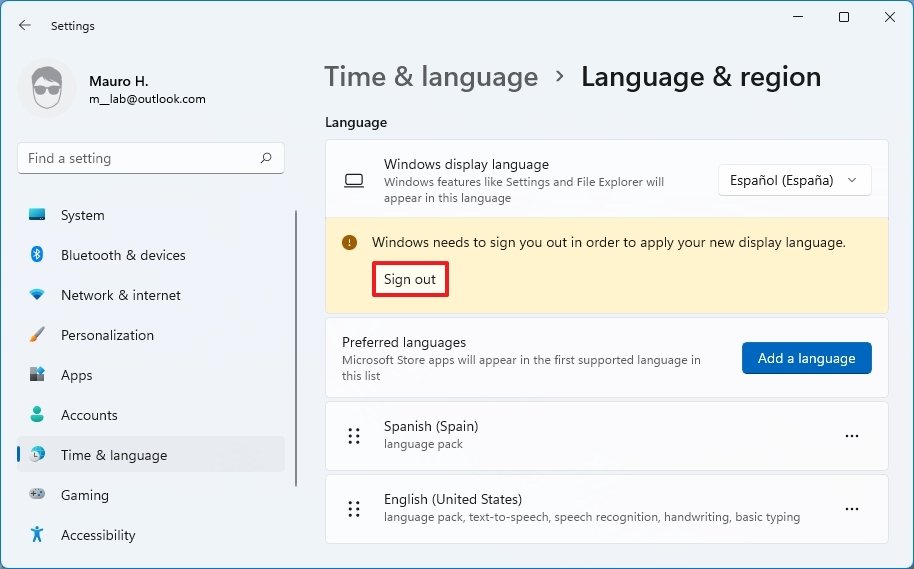
-
Click the Sign out button.
 Source: Windows Central
 - Sign into the business relationship to start using the new language.


After you consummate the steps, the display language will apply throughout the experience, including the Sign-in screen, Settings app, File Explorer, Desktop, apps, browser, and the spider web.
Configure region settings
As well, if yous are irresolute the language settings considering you are in a different location, you may also demand to adjust the region settings.
To prepare different region settings on Windows 11, use these steps:
- Open Settings.
- Click on Time & linguistic communication.
-
Click the Language & region page in the correct side.
Source: Windows Central -
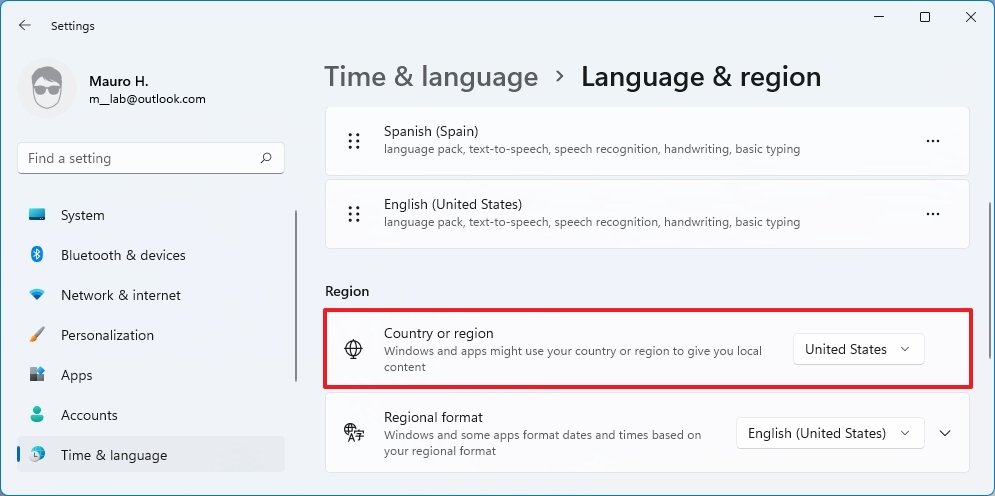
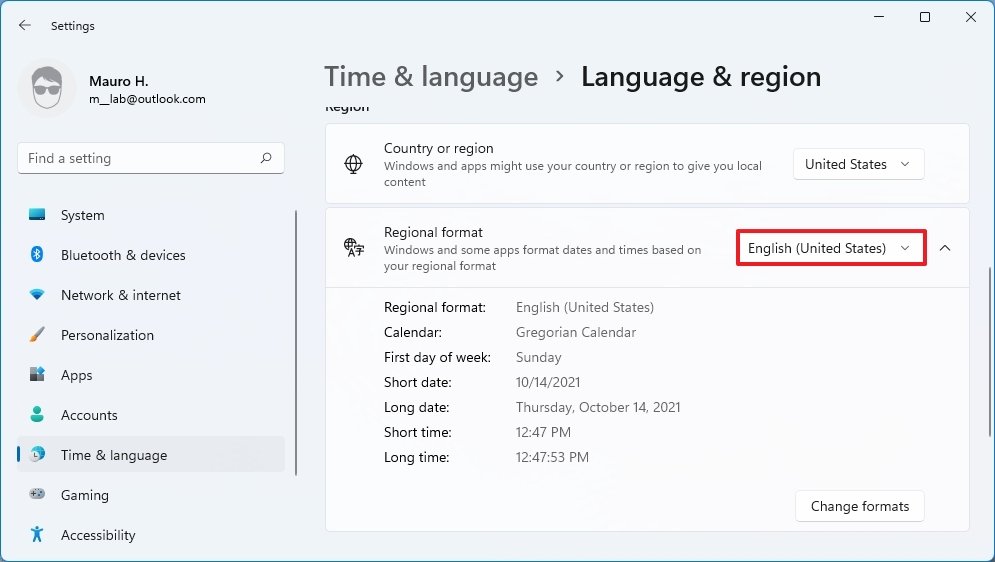
Under the "Region" section, utilise the Land or region setting to select the electric current location (if applicative).
 Source: Windows Central
 -
Utilize the "Regional format" setting to select the correct formats for the new region's date and time (if applicative).
 Source: Windows Central
 Quick tip: Yous can also expand the setting and click the Modify formats button to change other regional settings, including calendar, first day of the week, short date, and fourth dimension format.
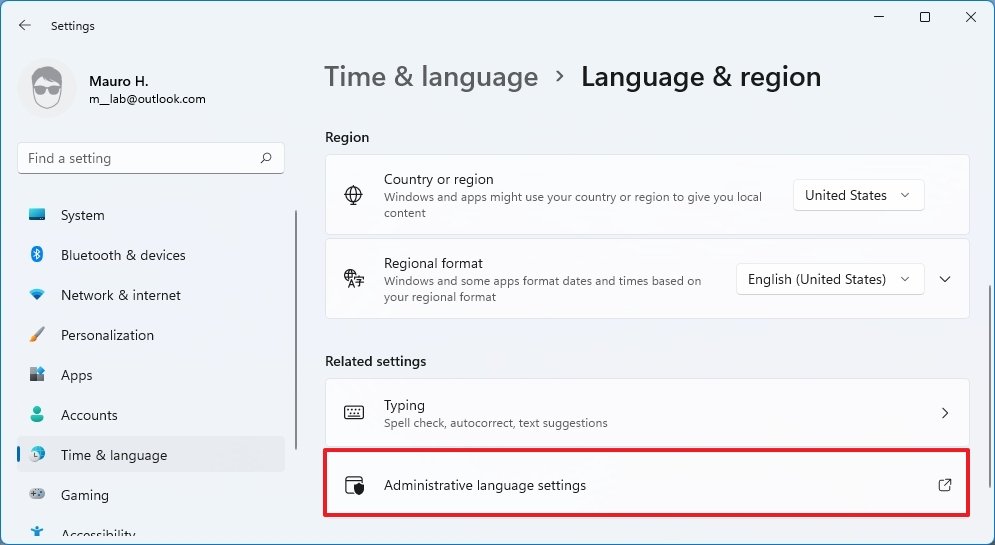
- Under the "Related settings" section, click the Administrative language settings selection.
-
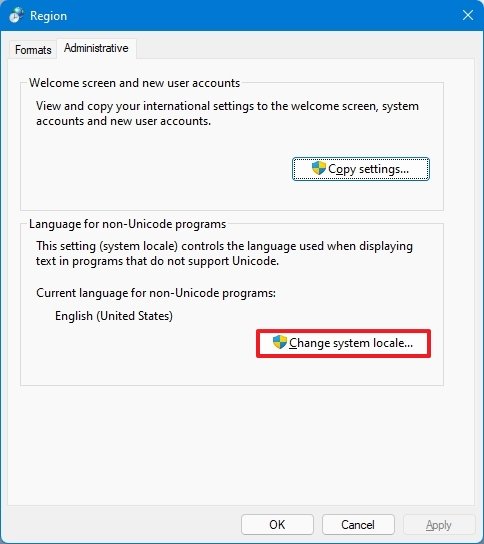
Click the Administrative tab.
 Source: Windows Central
 -
Under the "Language for not-Unicode programs" section, click the Alter system locale push.
 Source: Windows Central
 -
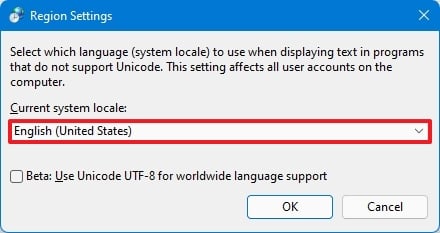
Select the new system locale past specifying the new linguistic communication.
 Source: Windows Central
 - Click the OK button.
- Click the Cancel button.
-
Click the Copy settings button.
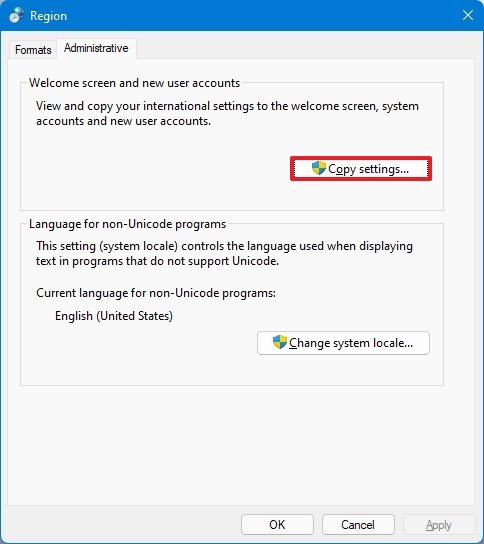 Source: Windows Central
 -
Under the "Copy your current settings to" department, check the Welcome screen and system accounts and New user accounts options.
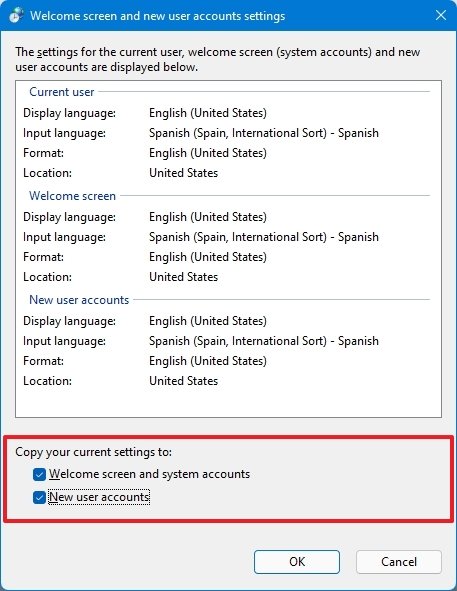 Source: Windows Central
 - Click the OK push button.
- Click the OK push over again.
- Click the Restart now push button.


Once you complete the steps, the laptop or desktop calculator will brandish the correct region settings.
Although users rarely need to adapt or add more than languages to Windows 11, these settings tin come in handy to match the local settings if y'all are in a different region of the globe or when getting a computer comes with different settings. The only thing you need to remember is that irresolute the linguistic communication settings volition cause the Microsoft Store and web browsers to show content based on those settings.
More Windows resource
For more helpful manufactures, coverage, and answers to mutual questions about Windows ten and Windows 11, visit the following resources:
- Windows x on Windows Central — All you lot need to know
- Windows ten help, tips, and tricks
- Windows 11 on Windows Central — All yous demand to know
- Windows 11 help, tips, and tricks

Source: https://www.windowscentral.com/how-change-system-language-windows-10
Posted by: cooklantoo.blogspot.com
0 Response to "How to change system language on Windows 11"
Post a Comment